SETTING UP A PORTAL


Log in as a Master Administrator.
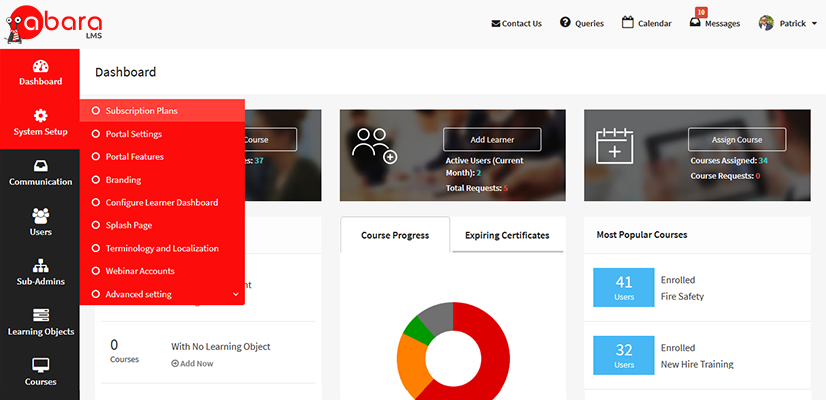
On the left menu pane, select System Setup.
Click the Portal Settings option.

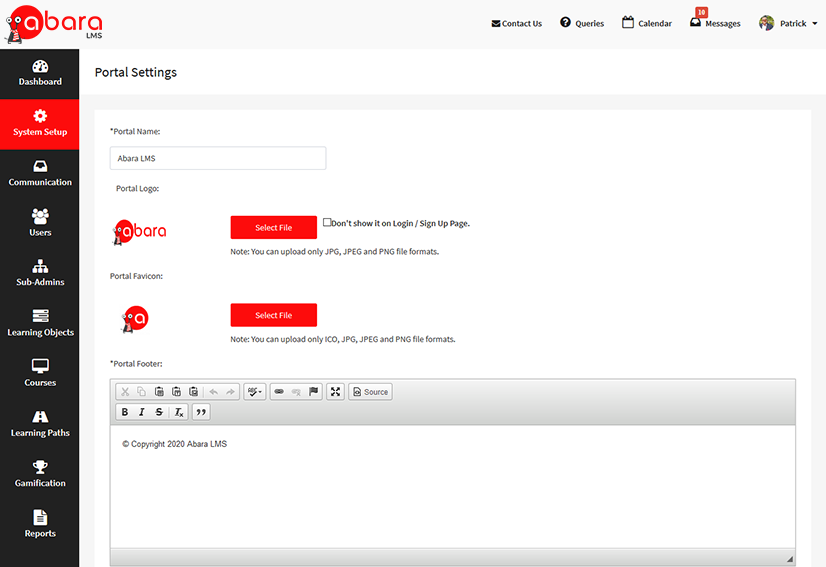
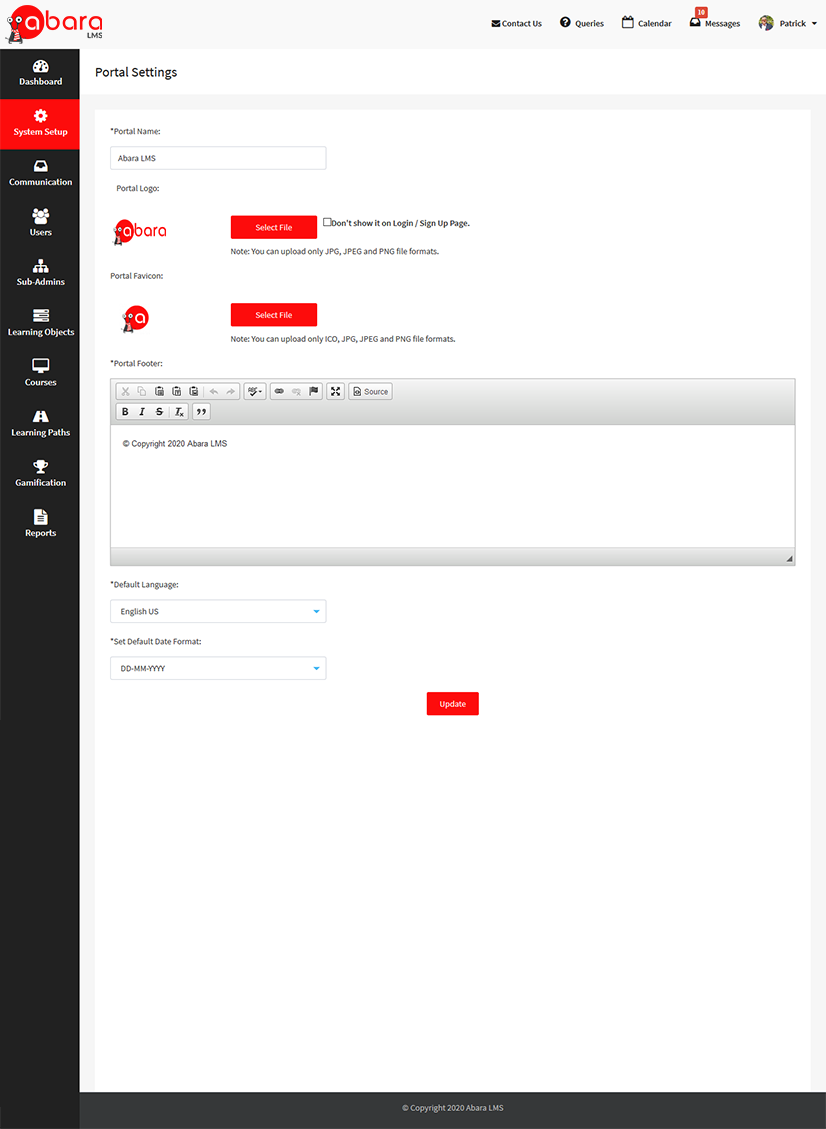
You will be redirected to the Portal Settings page, where you can customize the portal name, logo, favicon, and support email address.
In the Portal Name field, type a portal name.
To upload an image to use as your new logo, click Select File, and select your image.
Your new logo will then be shown in the upper-left corner of the platform.
You can use the official logo of your company or an image referring to the specific training project. The most important aspect of your logo choice is selecting a logo that captivates and attracts the attention of your audience. You can only upload images with JPG, JPEG, PNG, GIF, and BMP file types.
To upload a custom portal favicon, click Select File, and select an icon from your computer.
This is the icon shown on your browser’s tab and top bar. Remember, you can only upload images with ICO, JPG, JPEG, PNG, GIF, and BMP file types.
Enter the details that you want to show in the portal footer.
In the Support Email Address field, type the email address on which you can send your queries or request to expect help in writing.
In the Default Language field, select the language as per your requirement.
Click the Contact Us link at the top of the page to contact the Helpdesk team.
Once the required information is entered, click Update.
