
HOW TO MANAGE PORTAL BRANDING

Log in as a Master Administrator.
In the left menu pane, select System Setup.
Click the Branding option.
You will be redirected to the Branding Welcome page, where you can customize your portal.
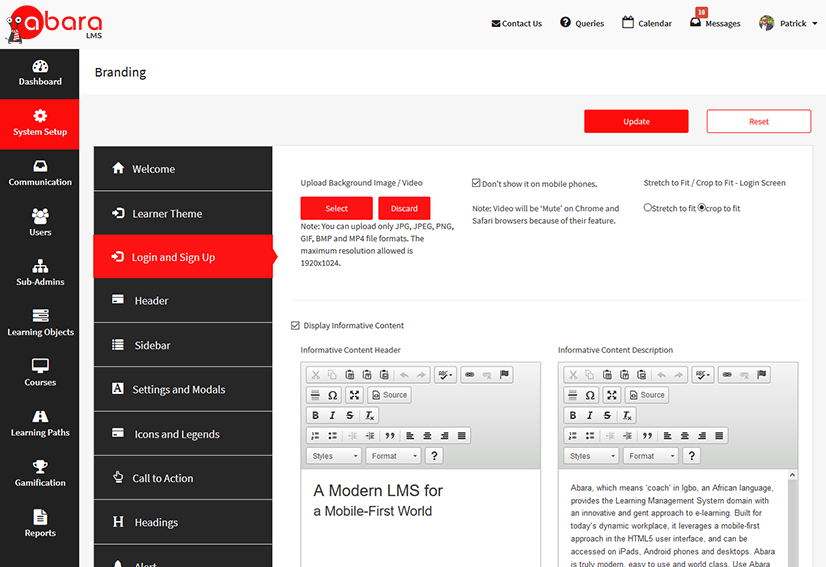

CUSTOMIZING THE LOG IN AND SIGN UP SCREEN
You can customize your Login & Sign Up page by applying your branding for the parameters shown here.
Click Update to confirm the changes.
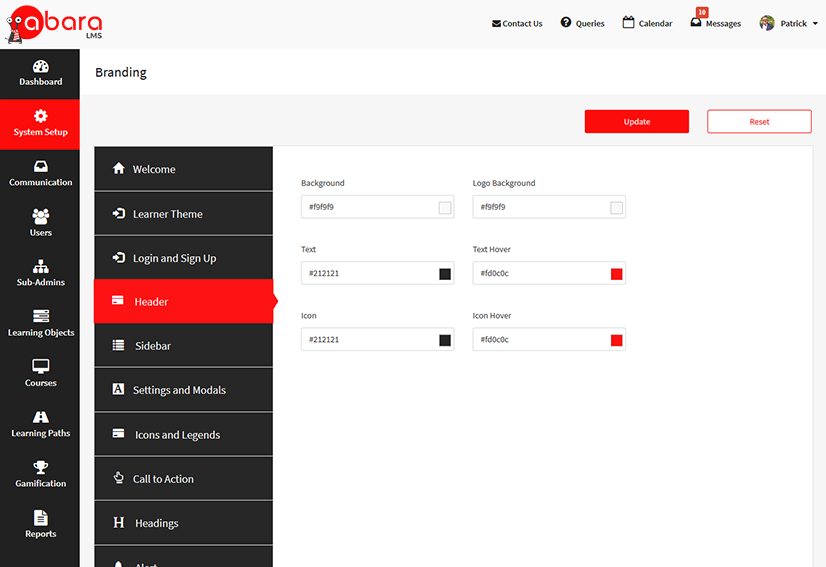
CUSTOMIZING THE HEADER
After clicking Header, you can change the background, text, and icon color of your portal.
Click Update to confirm the changes.

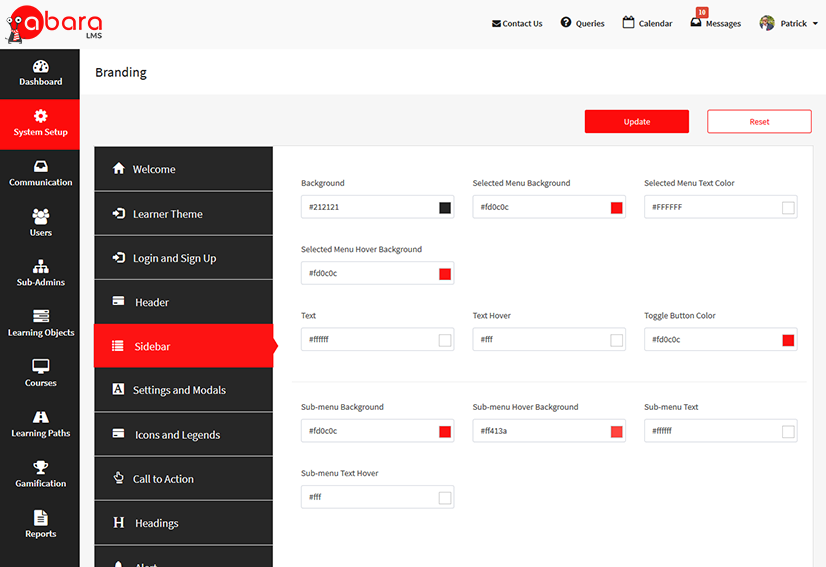

CUSTOMIZING THE SIDEBAR
After clicking Sidebar, you can customize your portal based upon the parameters shown here.
Click Update to confirm the changes.
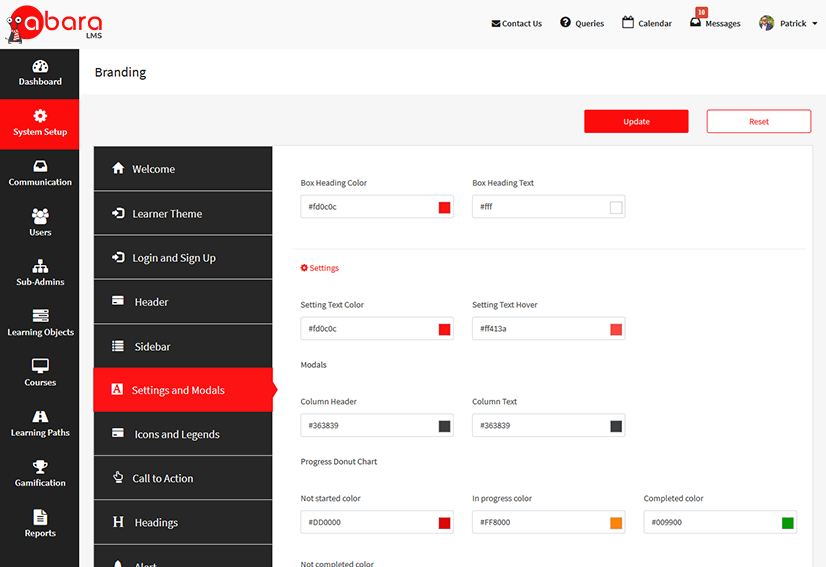
CUSTOMIZING THE SETTINGS AND MODALS
After clicking Settings & Modals, you can change the color of box and icons of headings, settings, and modals.
Click Update to confirm the changes.

CUSTOMIZING ICONS
Click the Icon tab, you can change the icon colors of your portal.
Click Update to confirm the changes.
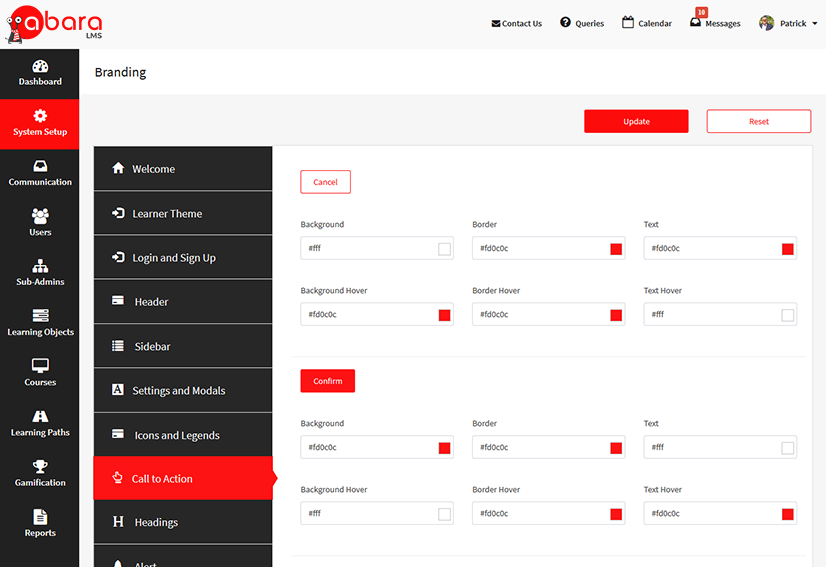
CUSTOMIZING THE CALL TO ACTION
After clicking Call to Action, you can customize the parameters as per your branding.
Click Update to confirm the changes.

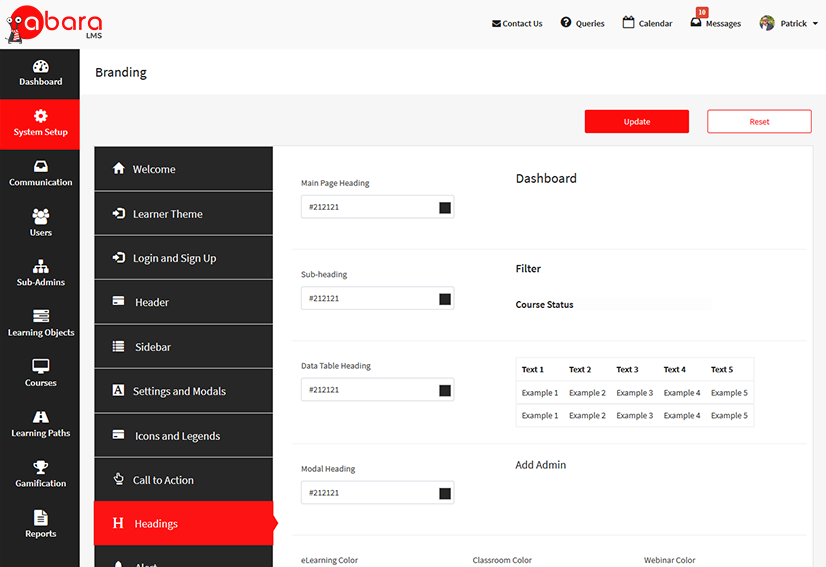

CUSTOMIZING HEADINGS
After clicking Headings, you can change the heading colors of your portal.
Click Update to confirm the changes.
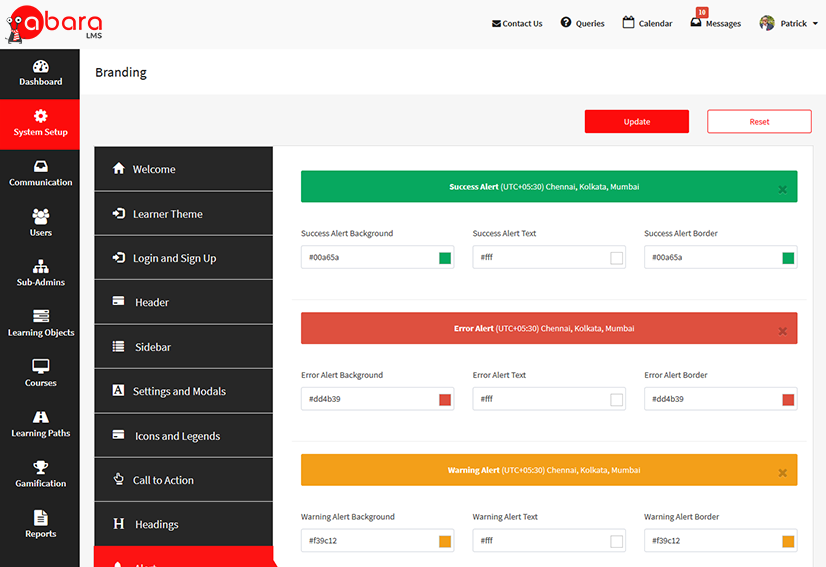
CUSTOMIZING ALERTS
After clicking the Alert tab, you can customize the colors of the alert messages in your portal.
Click Update to confirm the changes.

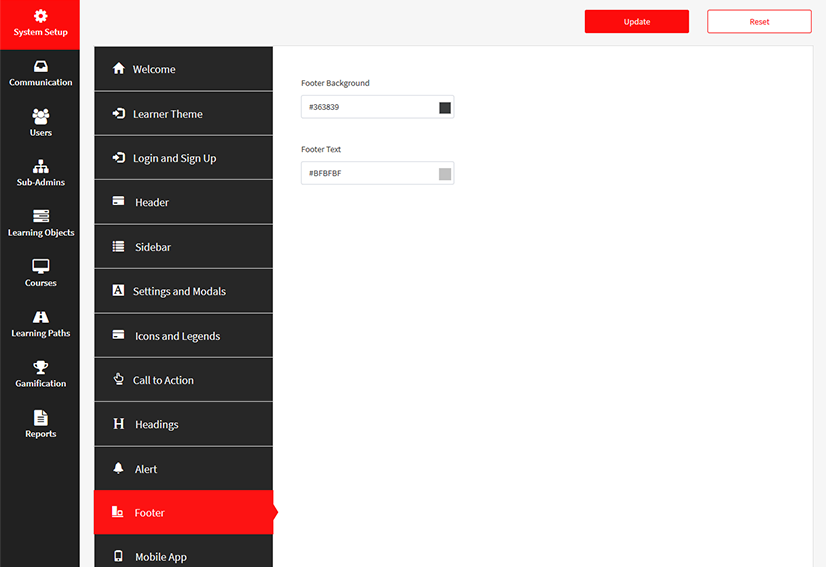

CUSTOMIZING THE FOOTER
After clicking the Footer tab, you can change the color of the footer text and the background of your portal.
Click Update to confirm the changes.
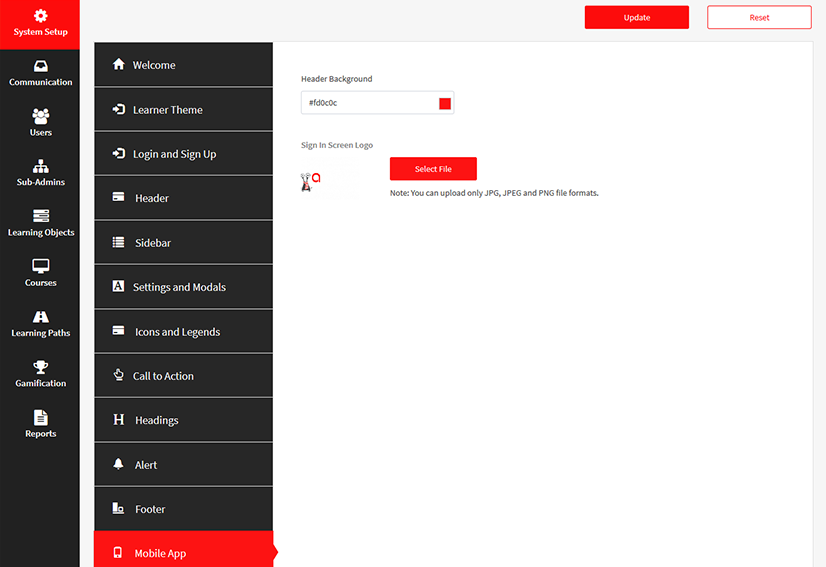
CUSTOMIZING THE MOBILE APP
